How to Remove DRM from Apple Music [4 Best Solutions]

As you start using Apple Music, it will give you a three-month trial, which requires no fee for enjoying Apple Music membership. However, when the 3 months pass, you will need to pay for continue on streaming Apple Music without limitations. That’s because Apple Music has used DRM as a way to protect the streaming songs. After adding the DRM protection, you will follow the following limitations after the three-month trial expires:
• You can’t download the Apple Music songs for listening offline anymore
• The downloaded Apple Music songs will not be playable offline
• You has skip-limit while playing the radio stations in Apple Music
• The “Connect” conten can’t be accessed under a free account
As a result, to let you continue on enjoying Apple Music neglecting the limitations set by the DRM protection, this article will tell you the 4 simplest ways to remove it from Apple Music. To enjoy a more convenient Apple Music playback, you should take a look.
People Also Read:
• 5 Methods to Remove DRM from M4P Files [Fixed]• How to Remove Audible DRM Without iTunes [5 Solutions]
Part 1. The Easiest Way to Remove DRM from Apple Music (Recommended)
The best way to remove DRM from Apple Music and keep the songs forever offline, you need the help of a reliable software, which is Apple Music Converter.
Apple Music Converter is a stable software developed for Windows and Mac users to unlock the DRM protection from Apple Music songs and convert the protected songs to MP3 and other audio formats such as M4A, AAC, AC3, AIFF, and AU for offline playback. The quality of the Apple Music will be kept in 100% original status, and the ID3 tags such as artist, cover, and album can be saved even after the conversion.
Features:
• Supports to convert Apple Music, iTunes songs, Audible books inside one software
• Provides common formats such as MP3, M4A, AAC, AC3, AIFF, and AU to convert Apple Music
• Offers up to 10X faster downloading speed
• Keeps song quality in original condition without loss
• Saves the ID3 tags & metadata information for all converted songs
• Offers user-friendly UI and free trial version
Steps to Remove Apple Music DRM with Apple Music Converter
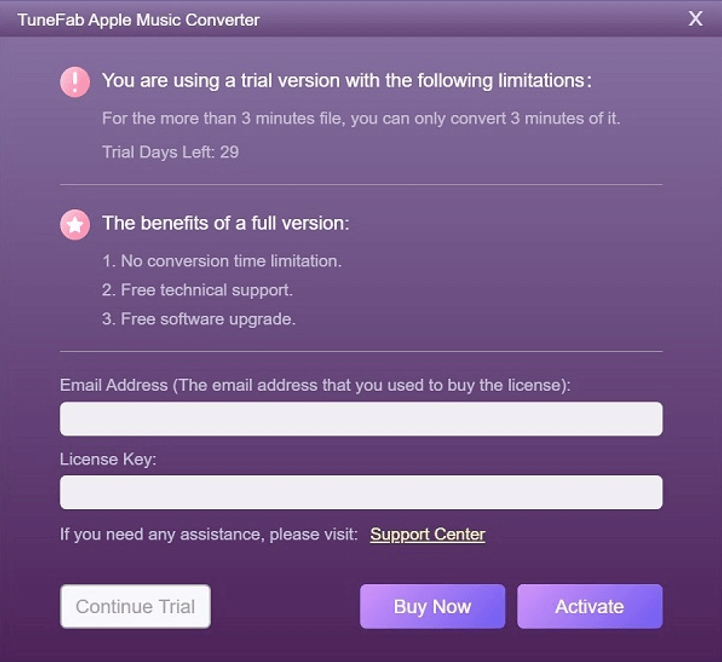
Step 1. Install and Launch Apple Music Converter
You should install Apple Music Converter to your Windows or Mac computer at first. When you run the converter, it will also open iTunes, so make sure that you have installed iTunes as well.
When you open the Apple Music Converter, a window will pop up to let you register the software. Before purchasing a license, you can click the “Continue Trial” to use Apple Music Converter for free.
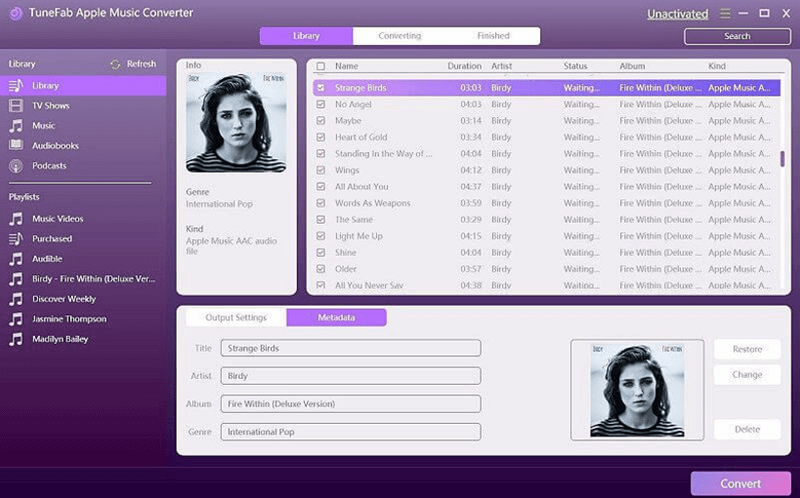
Step 2. Select Apple Music Songs
Apple Music Converter will connect to iTunes, then your saved playlists will appear on the left panel. Select the playlist and also choose the songs you want to remove their DRM.
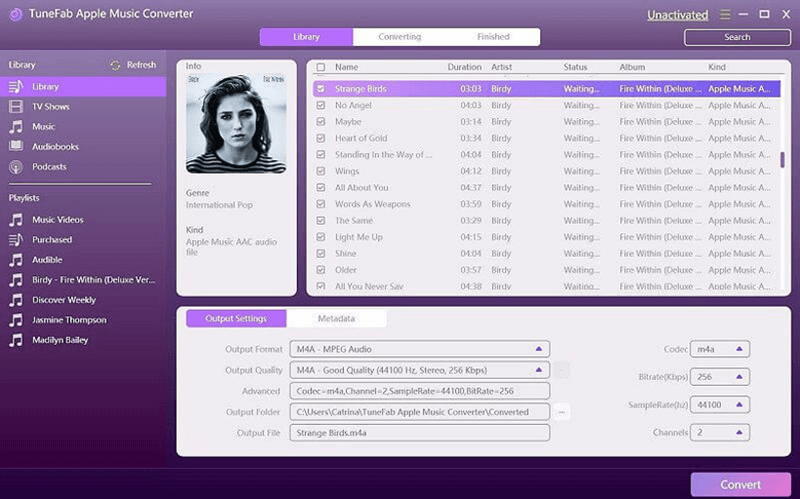
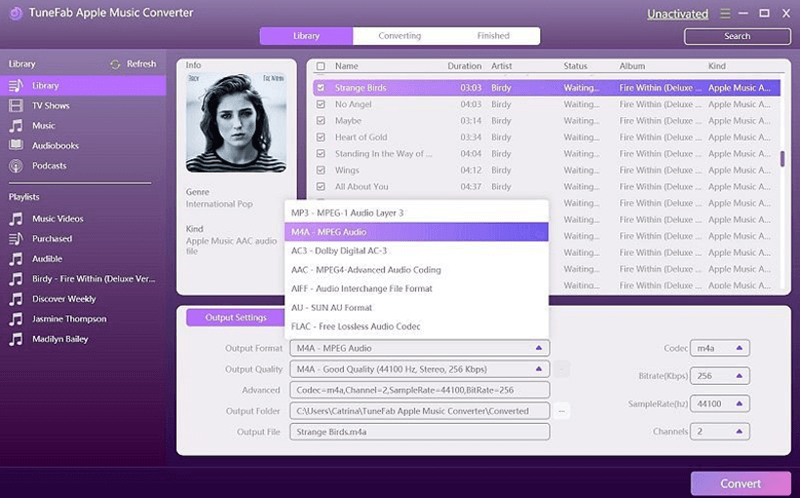
Step 3. Output Settings
Now you can go to “Output Settings” and choose the “Output Format”, “Output Quality”, and also set the “Advanced” such as “Codec”, “Bitrate”, “SampleRate”, and “Channels” to convert the Apple Music.
Step 4. Edit Metadata Before the Conversion
Go to “Metadata” beside “Output Settings”, you can edit the “Title”, “Artist”, “Album”, “Genre”, and also change the cover of the Apple Music before starting to remove DRM.
Step 5. Start Converting Apple Music and Remove DRM
Finally, just click the “Convert” button, and the selected Apple Music will all be added to the list and start converting your selected format. During this process, the DRM protection will also be removed from the songs.
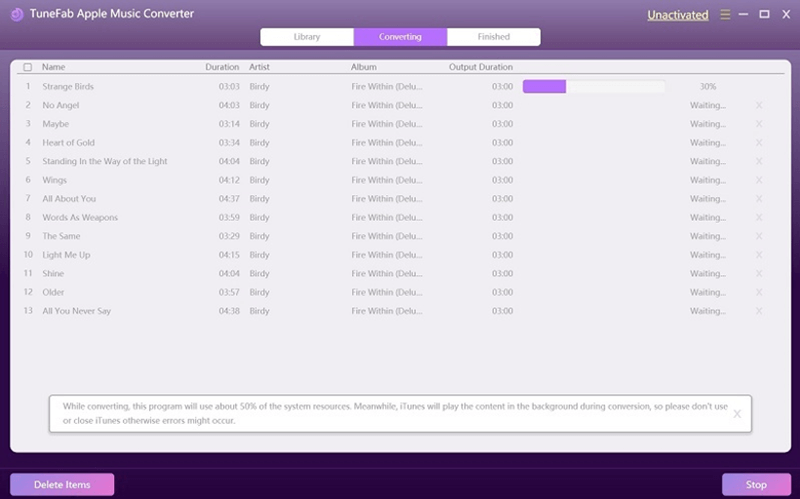
After the DRM is removed, you can get the DRM-free Apple Music and make them playable offline at anytime and anywhere.
Part 2. Remove Apple Music DRM by Recording and Saving as MP3
Except for the Apple Music Converter, another convenient method to remove Apple Music DRM is to record the songs and save the recordings as MP3 files for later playback. This would need an easy-to-use audio recorder, and VideoSolo Screen Recorder is a good choice, which will bring very quick and high-quality recording service to let you easily record Apple Music on computers. It can save the recordings in MP3 or M4A audio, and also with the audio enhancement mode, people can record Apple Music with great quality for listening offline.
Steps to Remove Apple Music DRM with VideoSolo Screen Recorder
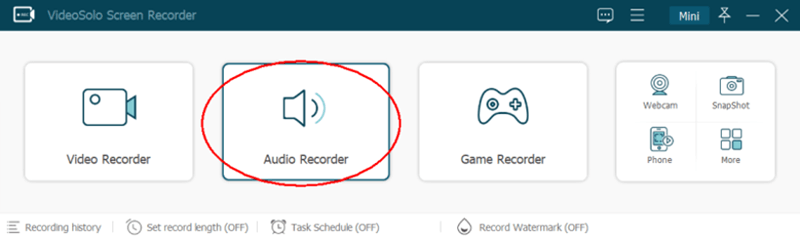
Step 1. Install and Open VideoSolo Screen Recorder
VideoSolo Screen Recorder provides Windows and Mac version, so you should choose the right one to install on your computer. Then open VideoSolo Screen Recorder and enter “Audio Recorder”.
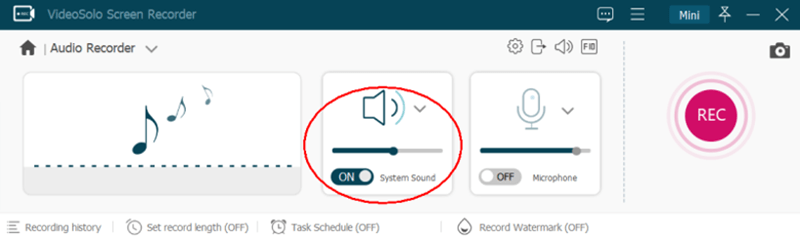
Step 2. Set System Sound Volume
You can adjust the system volume before starting to record Apple Music. It would be better for you to turn of the microphone so that you won’t record the noise.
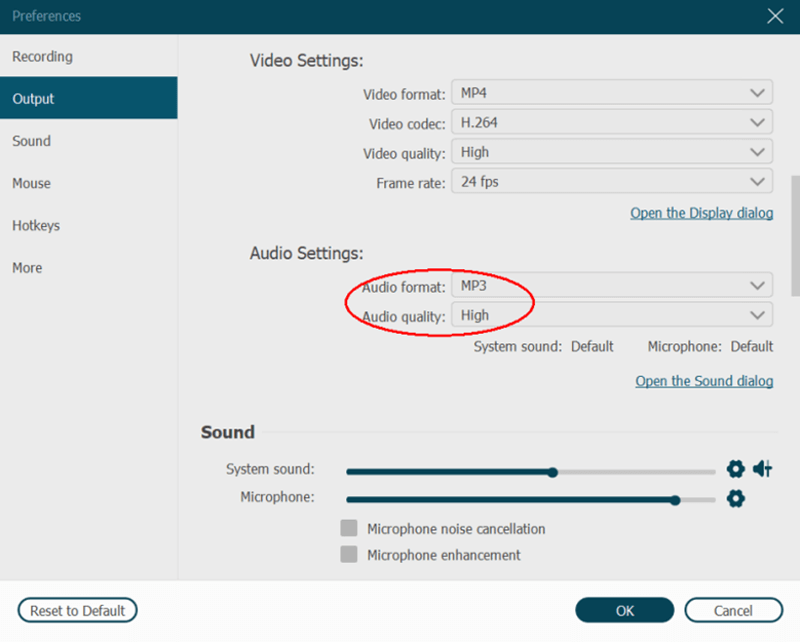
Step 3. Set Audio Settings
By going to “Preferences”, you can set the “Audio Settings” such as format and quality in “Output” section. Click “OK” for saving the changes.
Step 4. Record Apple Music
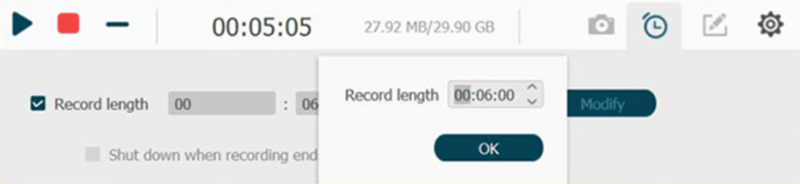
Then by pressing the “REC” button and play the Apple Music for recording the song. You can also set the “Record length” to let the recording end by itself automatically. Or when the recording is over, manually click the stop button and the recording is done.
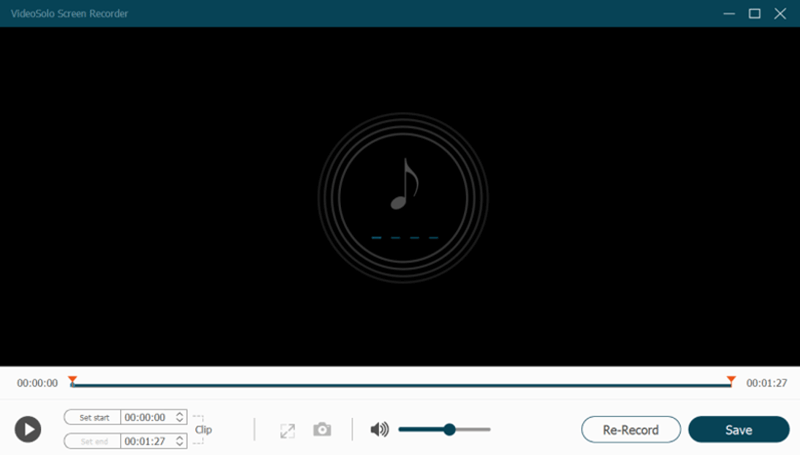
Step 5. Save the DRM-free Apple Music
When you are turned to the preview window, you can check the recorded Apple Music and click “Save” to keep the recording for offline playback.
Part 3. Burn DRM-Protected iTunes Songs to CD/DVD
Although Apple has stopped people from directly converting protected Apple Music and iTunes songs to MP3 format, you can still burn the songs to CD or DVD with an official software, iTunes, so that the songs can be saved in DRM-free condition. It would only take several simple steps to do the burning process. Let’s have a look.
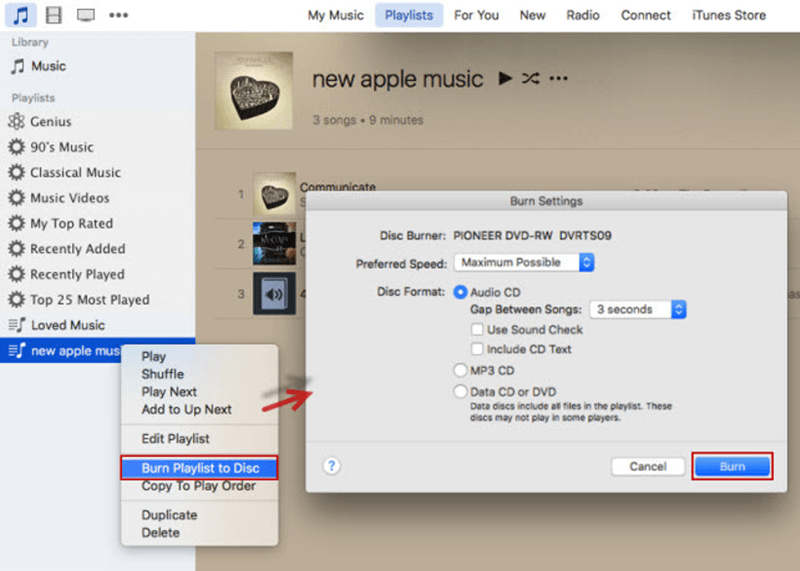
Step 1. Open iTunes on your computer and then also insert a blank CD or DVD to it. You should also create a new playlist in iTunes at first.
Step 2. Now you can select the iTunes or Apple Music songs for adding them to the playlist you just create.
Step 3. Now, right-click on the playlist and then choose to “Burn Playlist to Disc”. Then you can preset the settings in the pop-up window. For example, you can select to burn the playlist as an “Audio CD” or “MP3 CD” based on your needs.
Step 4. When click the “Burn” button, the selected songs will be burned to the CD without DRM protection anymore.
This conclusion table simply shows the differences of using the above 3 solutions to remove DRM from Apple Music:
|
Speed |
Quality |
Output Format |
Disadvantages |
|
|
Apple Music Converter |
10X faster |
100% original |
MP3, M4A, AAC, AC3, AIFF, and AU |
Free trial can only convert 3 minutes of a song |
|
VideoSolo Screen Recorder |
Based on the song length |
100% original |
MP3 and M4A |
It will be time-wasting if there are many Apple Music songs needed to record |
|
iTunes Burn to CD/DVD |
Slow |
Compressed |
CD, DVD |
Can’t save the songs in common digital formats |
Part 4. Extra Tip: How to Remove DRM Protection from iTunes Movies
From the above tutorials, we know the different ways we can try to remove DRM from Apple Music and iTunes songs. But we also know that the DRM protection will also be added to videos by Apple, such as those iTunes movies. So, can the converter also help to remove DRM from iTunes movies?
Unluckily, Apple Music Converter only works to do the audio DRM removal. For iTunes movie DRM removal, you need the help of another software, which is TuneFab M4V Converter, the tool specially designed for iTunes videos DRM removal.
Features:
• Converts iTunes M4V movies/TV shows/MV to MP4 without DRM
• Saves the original quality during the conversion
• Keeps Dolby 5.1 soundtracks, subtitles, CC and AD
• Saves converted videos in HD 1080p/720p
Steps to Remove DRM from iTunes Movie Using TuneFab M4V Converter
Step 1. After installing TuneFab M4V Converter, open it and iTunes will also be launched.
Step 2. In TuneFab M4V Converter, you can directly click the “Add Files” button to select the movies you have added to iTunes Library. But you need to make sure that you have downloaded the iTunes movies in iTunes before.
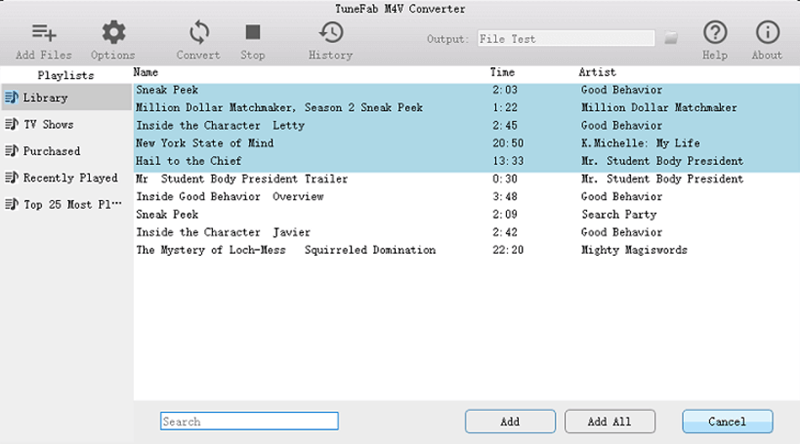
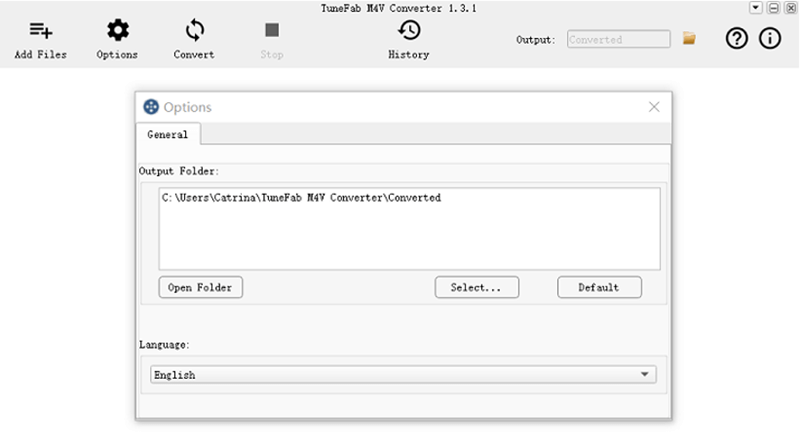
Step 3. After selecting the iTunes movies, click “Add” and they can be added to TuneFab M4V Converter. Now you can go to “Options” and choose output folder for saving it.
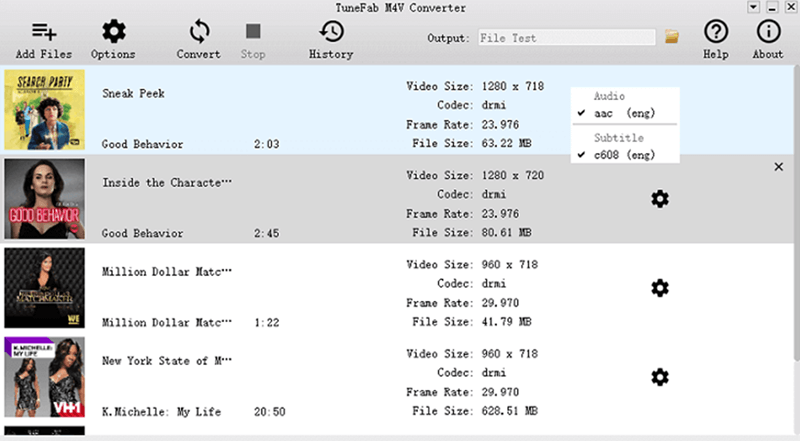
Step 4. Also, select the audio tracks and subtitles you want to convert with the movies.
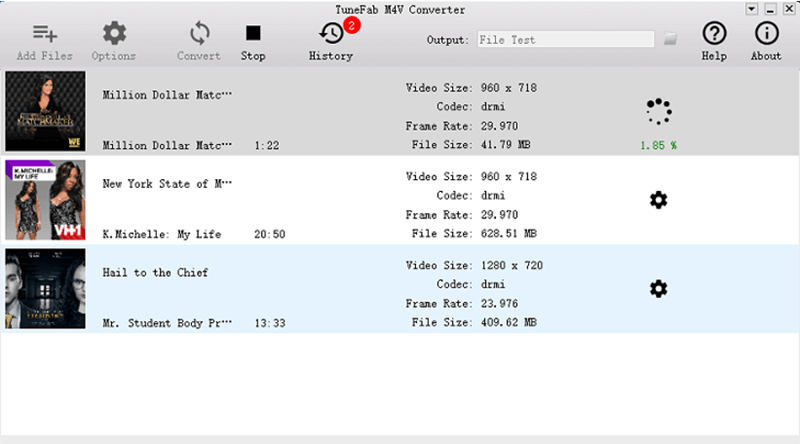
Step 5. Finally, just click the “Convert” button, then the iTunes movies will be converted to MP4 files for watching offline.
Part 5. Things You Need to Know About Apple Music FairPlay DRM Protection
What Is Apple Music FairPlay DRM Protection?
FairPlay DRM is also called DRM (Digital Rights Management), which is a proprietary encryption scheme developed by Apple to protect its streaming media content such as music, videos, eBooks, and so on. By adding the FairPlay DRM, people can’t download or convert the content, and they need to follow the rules in using them. For example, only Apple Music membership can download the songs for playing offline. But for free users, they can’t do this.
Why We Need to Remove DRM from Apple Music?
By removing DRM from the Apple Music, people are actually getting the songs to be played in more flexible ways. For example, they can download the songs as common media files such as MP3, M4A, etc. and then transfer them to all devices for playback, including MP3 players, iPod nano/shuffle/classic, PS4, and so on. Without DRM, the Apple Music content can be played offline more conveniently.
In Conclusion
Although DRM has stopped us from enjoying Apple Music and other streaming media content freely and conveniently, we still have the ways to remove it. The above methods are all reliable to remove DRM from Apple Music and iTunes movies. Try any of them and get the flexible way to enjoy your favorite songs or movies offline!
- How to Remove DRM from Apple Music [4 Best Solutions]
- How to Remove Audible DRM Without iTunes [5 Solutions]
- Best 5 Free DRM Removal Software for Mac 2022
- Review: 2017 Top 3 Free DRM Removal Software
- myFairTunes Alternative to Convert Apple Music
- Not A Fan of Apple's FairPlay? Here's How to Say Goodbye to FairPlay DRM!